


Overview
Today, many websites have Drag and Drop functionality whenever there are some items that need to be rearranged. It increases the user experience many folds. Also, it is very simple to implement.
In this blog, I will show you how you can implement Drag n Drop in your React application in a few simple steps using react-beautiful-dnd.
You can find the whole code on GitHub.
What is react-beautiful-dnd?
react-beautiful-dnd is a React library that creates beautiful drag-and-drop animation easily.
Demo
Steps
Create a simple NextJs project
First, I am going to create a simple React project. I am using NextJs, but you can also use ReactJs. The steps will be the same for both.
In the
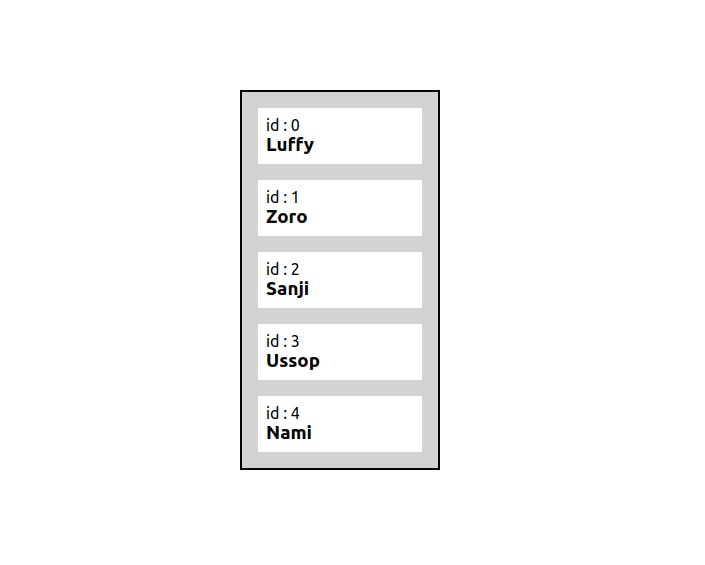
index.jsfile of our project will are going to create a list with basic stylingimport Head from 'next/head' // we are using list of One Piece characters to show const data =[ { id:"0", name:"Luffy" }, { id:"1", name:"Zoro" }, { id:"2", name:"Sanji" }, { id:"3", name:"Ussop" }, { id:"4", name:"Nami" } ] export default function Home() { return ( <> {/* List container */} <main className="list-cont"> {/* List */} <div className="list"> { data.map((el,idx)=>( // List Item <div className="list-item"> <p>id : {el.id}</p> <h3>{el.name}</h3> </div> )) } </div> </main> </> ) }This UI should look something like this
Install react-beautiful-dnd
Next, we need to install the
react-beautiful-dndlibrary.npm i react-beautiful-dndDragDropContext
Now we will start making our Drag-n-Drop functionality. For that, we are first going to import the
DragDropContextcomponent provided by thereact-beautiful-dndlibrary. It is the top-level component that provides the context for the Drag-n-Drop operation and is responsible for managing the lifecycle of the Drag-n-Drop operation.The general way to use
DragDropContextis given below.function MyComponent() { return ( <DragDropContext> {/* draggable area */} </DragDropContext> ); }In our case, we want to make the list of Characters the draggable area, so we are going to wrap the list inside the
DragDropContext<main className="list-cont"> <DragDropContext> {/* our list */} <div className="list"> { data.map((el,idx)=>( <div className="list-item"> <p>id : {el.id}</p> <h3>{el.name}</h3> </div> )) } </div> </DragDropContext> </main>Droppable
Next, we will be using be
Droppablecomponent provided by thereact-beautiful-dnd.TheDroppablecomponent is used to define the area where draggable items can be dropped. For us area to drop the list items is going to be the list itself.The general way of using
Droppableis given belowfunction MyComponent() { return ( <Droppable droppableId="my-droppable"> {(provided) => ( <div ref={provided.innerRef} {...provided.droppableProps} > {/* list of draggable items */} </div> )} </Droppable> ); }In the above code, you can see that the droppable takes a required
droppableIdprop which is a unique id that identifies theDroppablecomponent. Also, the list of draggable items is going to be wrapped inside a function, which takes a single argument calledprovided, which contains props that should be applied to the top-level element of the droppable area(In our case, it's our list). This is just some boilerplate code that we have to write when usingDroppable.As I said, we want our list itself to be the droppable area, so we are going to wrap our list inside the
Droppablecomponent.<main className="list-cont"> <DragDropContext> <Droppable droppableId="characters"> { (provided)=>( <div className="list" {...provided.droppableProps} ref={provided.innerRef}> { data.map((el,idx)=>( <div className="list-item"> <p>id : {el.id}</p> <h3>{el.name}</h3> </div> )) } </div> ) } </Droppable> </DragDropContext> </main>Draggable
The next and final component that we need is the
Draggablecomponent.Draggableis used to define the draggable elements that can be moved within aDroppablearea. In our case, the draggable elements are going to be our list items, so we will be wrapping them insideDraggable.The general way of using
Draggableis given belowfunction MyComponent({ item, index }) { return ( <Draggable draggableId={item.id} index={index}> {(provided) => ( <div ref={provided.innerRef} {...provided.draggableProps} {...provided.dragHandleProps} > {/* draggable items */} </div> )} </Draggable> ); }In the above code, you can see that the
Draggablecomponent has two required props:draggableIdandindex. ThedraggableIdprop is used to identify the draggable items and theindexprop is used to specify the position of each draggable item in the list.For our purpose, we are going to give the id provided to each character in
draggableId(ThedraggableIdshould be a string) and the current index of the list item(that we get from the map function) is given toindexprop inDraggable.<main className="list-cont"> <DragDropContext> <Droppable droppableId="characters"> { (provided)=>( <div className="list" {...provided.droppableProps} ref={provided.innerRef}> { characters.map((el,idx)=>( <Draggable key={el.id} draggableId={el.id} index={idx} > { (provided)=>( <div className="list-item" {...provided.draggableProps} {...provided.dragHandleProps} ref={provided.innerRef} > <p>id : {el.id}</p> <h3>{el.name}</h3> </div> ) } </Draggable> )) } {provided.placeholder} </div> ) } </Droppable> </DragDropContext> </main>Final Touches
Now you will see that our Drag-n-Drop functionality is complete, but there is a small problem with that. Once we drop the list item, it goes to its original position. It is because, when we are dropping the list item to a new place, we are not changing it's position.
To make the Drag-n-Drop work properly we are going to add a few things.
 export default function Home() {

   // use a useState array and initialze it with the data array
   const [characters,setCharacters]= useState(data)

   function handleDrag(result){
      // The onDragEnd function takes a result object as an argument, which contains information about the drag and drop operation like source and destination indexes of the dragged item.
      console.log(result)
   }

   return (
     <>
       <main className="list-cont">
         {/* add onDragEnd. The handleDrag function is going to be called whenever a drag and drop is completed */}
         <DragDropContext onDragEnd={handleDrag}>
            {/* code */}
            {/* use the character useState array to map the list item */}
                characters.map((el,idx)=>(
                     {/* code */}
                 ))
            {/* code */}
         </DragDropContext>
       </main>
     </>
   )
 }
The output of the
console.login thehandleDragfunction will look like this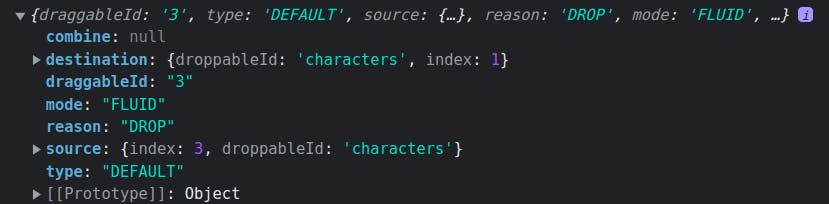
To put it simply, it says that the item with
draggableId'3' is dropped in destination index 1 from source index 3.We will be changing the
charactersarray inside thehandleDragfunction according to theresult.function handleDrag(result){ // handle the condition when the user drops the draggable item out side droppable area if(!result.destination) return // change the array using the following code const temp = Array.from(characters) const [reorderedItem] = temp.splice(result.source.index,1) temp.splice(result.destination.index,0,reorderedItem) setCharacters(temp) }
Woo hoo! Our Drag-n-Drop is ready🥳
We have implemented the Drag-n-Drop in our React app. Comment down your suggestions and like the blog for better reach.
Thank you for being till the end and check out my other interesting blogs here: yashnirmal.hashnode.dev
Previous 3 blogs👇 :