


Overview
In this blog, we are going to learn how we can do Google Sign In in our Nextjs web application. We will be using next-auth-js for authentication.
You can check the whole code on my Github: https://github.com/yashnirmal/next-google-auth
Why use Next-Auth?
Much easier than traditional ways
Low setup time
It's open source, so it's free
It gives a lot of other providers for authentication other than google like Apple, Github, Twitter, Facebook, etc. And once you integrate one provider, you can also integrate others with only a few lines of code
It's specially designed for Nextjs
Step we will follow
First setup our project in the google cloud console and then get the clientId and clientSecretKey from there
Create and Setup NextJs application
Setup project in google cloud console
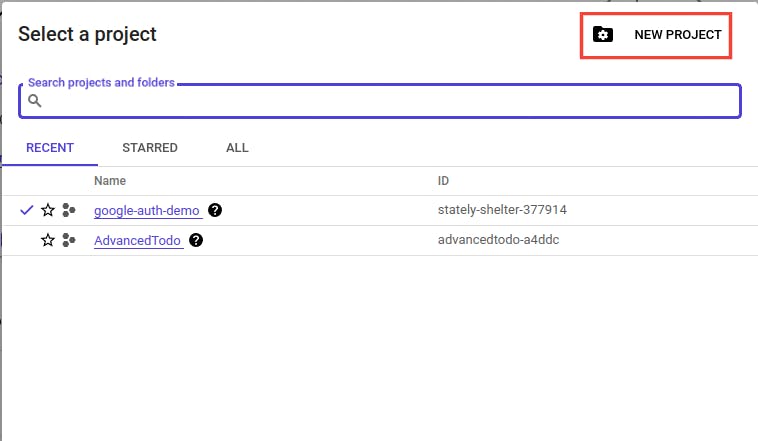
To make a new google cloud project go to https://console.cloud.google.com/ and hit the project section in the navigation bar.

Then hit 'New Project' in the popup.
Enter Project details and hit 'Create'

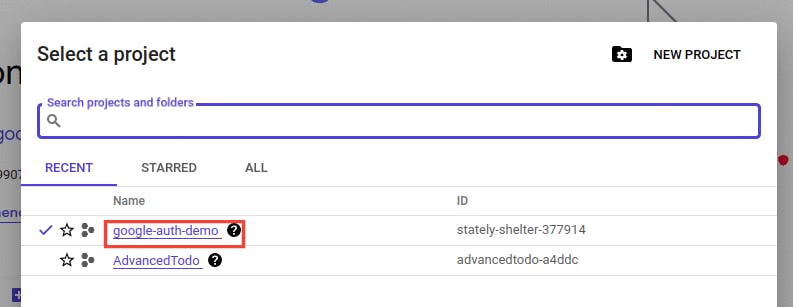
Choose the project
After this go to "APIs and Services > OAuth consent screen" or follow the URL https://console.cloud.google.com/apis/credentials/consent
Now we have to enter some essential project details.
First, choose 'External' and then hit 'create'

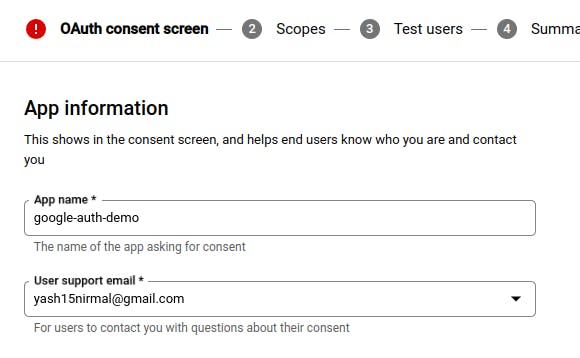
After this enter the app name, user support email, and developer contact email and click "Save and continue".

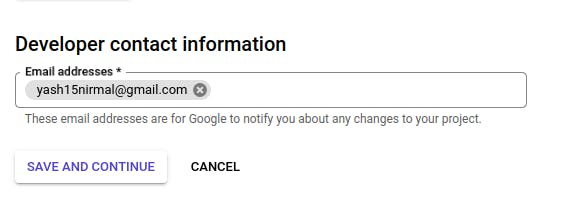
You might get an unexpected error like, in that case instead of "App Name" in the field put the projectId of our app which you can get from the drop-down, which is used to choose project, in the navigation bar.

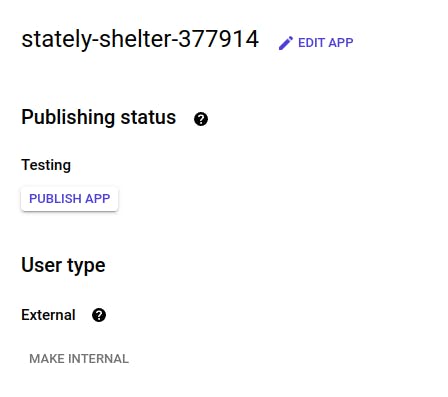
After this, all the other details are optional so you can skip them. And finally, click "Publish App".
After creating the app, you can go to https://console.cloud.google.com/apis/credentials to create your clientId and clientSecret key.
We will save these in the .env file of the NextJs application that we are going to create.
Create NextJs application
Create a NextJs application and install next-auth in it.
npm i next-authAfter this create a .env file to store the following things in that. YOu will have to change the NEXTAUTH_URL from localhost to production url when pushing the app to production
.env
GOOGLE_CLIENT_ID=YOUR_GOOGLE_CLIENT_ID
GOOGLE_CLIENT_SECRET=YOUR_GOOGLE_CLIENT_SECRET
NEXTAUTH_URL=http://localhost:3000
pages/api/auth/[...nextauth].js
Now in the path pages/api create a auth folder and in that create a javascript file by the name [...nextauth].js
//pages/api/auth/[..nextauth].js

import NextAuth from 'next-auth';
import GoogleProvider from 'next-auth/providers/google'

export default NextAuth({
    providers:[
        GoogleProvider({
            clientId:process.env.GOOGLE_CLIENT_ID,
            clientSecret:process.env.GOOGLE_CLIENT_SECRET
        })
        // you can add more providers here
    ]
})
The best thing about Next-Auth is that all the requests to /api/auth/* will automatically be handled by NextAuth.js, so we don't have to worry about requesting or calling the backend.
pages/_app.js
Now we will have to make some changes to our _app.js file
import '@/styles/globals.css';
import {SessionProvider} from 'next-auth/react'

// we have wrapped SessionProvider and in that we are sending session as prop
export default function App({ Component, pageProps,session}) {
  return (
    <>
      <SessionProvider session={session} >
        <Component {...pageProps} />
      </SessionProvider>
    </>
  )
}
pages/index.js
In the index.js file, we will have our SignIn and SignOut functionalities.
If the user is already logged in i.e. session is already present, we will show user's name, email, and Signout button else we will show the Login button.
import Head from 'next/head';
import {useSession,signIn,signOut} from 'next-auth/react'
// importing useSession hook and singIn and singOut functions

export default function Home() {

  const {data:session} = useSession()

  return (
    <>
      <Head>
        <title>Next Google Auth</title>
        <meta name="description" content="Generated by create next app" />
        <meta name="viewport" content="width=device-width, initial-scale=1" />
        <link rel="icon" href="/favicon.ico" />
      </Head>
      <main>
        <div className="cont">
            {
              (!session)?
              <>
                <h3></h3>
                <button onClick={()=>signIn()}>Login</button>
              </>
              :<>
                <h3>Hello, {session.user.name} {session.user.email}</h3>
                <button onClick={()=>signOut()}>SignOut</button>
              </>
            }
        </div>
      </main>
    </>
  )
}
That's all! Yes, that's all and we have our Google Oauth functionality in our Nextjs application.
Bonus
There might be cases, where you have to redirect your user if they try to access a page that only a logged-in user can access. In that case, we can use help from getServerSideProps.
In this example, I want only logged-in users to access the userprofile page.
//pages/userprofile

import {useSession,getSession} from 'next-auth/react';


export default function UserProfile(){

    const {data:session,status} = useSession()
    // If not authenticated user will be redirected
    if(status==='authenticated')
    return (
        <div className="cont">
            <h3>Hello</h3>
            <h3>Name : {session.user.name} </h3>
            <h3>Email : {session.user.email} </h3>
        </div>
    )

}

export const getServerSideProps = async (context)=>{
    const session = await getSession(context);

    if(!session){
        return {
            redirect: {
                destination:'/'
                // url where you want to redirect your user
            }
        }
    }

    return {
        props:{
            session
        }
    }
}
Resources
NextAuth Docs : https://next-auth.js.org/getting-started/introduction
NextAuth npm package : https://www.npmjs.com/package/next-auth
all providers NextAuth provides : https://next-auth.js.org/providers
Conclusion
That's all for this blog guys, I will be back with another blog on monday. See you then. Also, if you guys got any questions, you can ask me in the comments.